To facilitate media rotation in the Enterprise software, set the protection plan to target a store group instead of a specific store. Create a store group, add member stores to it, set the store selection preference, and set the protection plan to use the store group. At protection plan startup, the plan will then select a member store for the backup according to the store group selection preference.
Create a Store Group
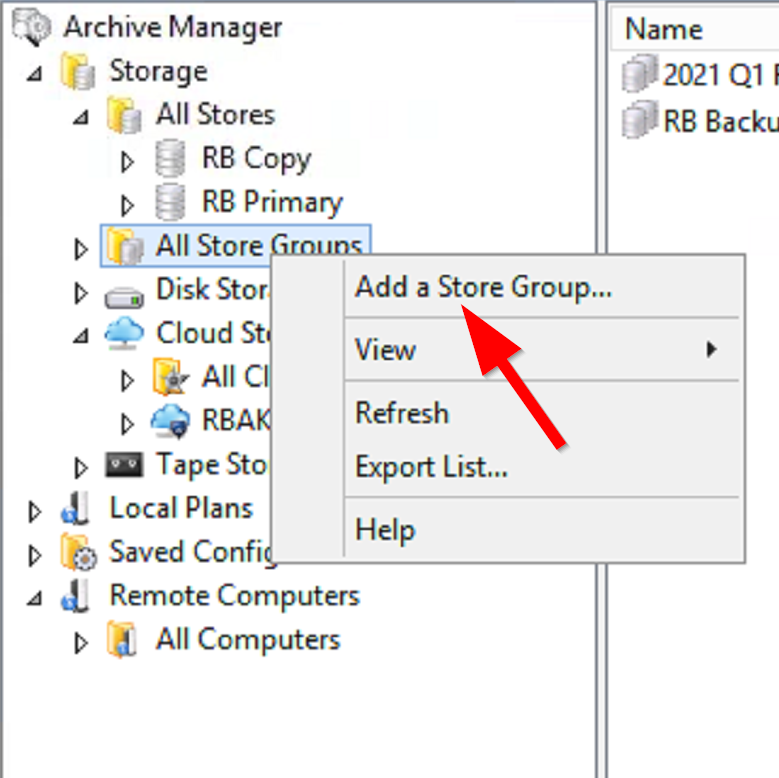
Go to Archive Manager > Storage > All Store Groups. Right click on All Store Groups and select 'Add a Store Group...' from the contextual menu.
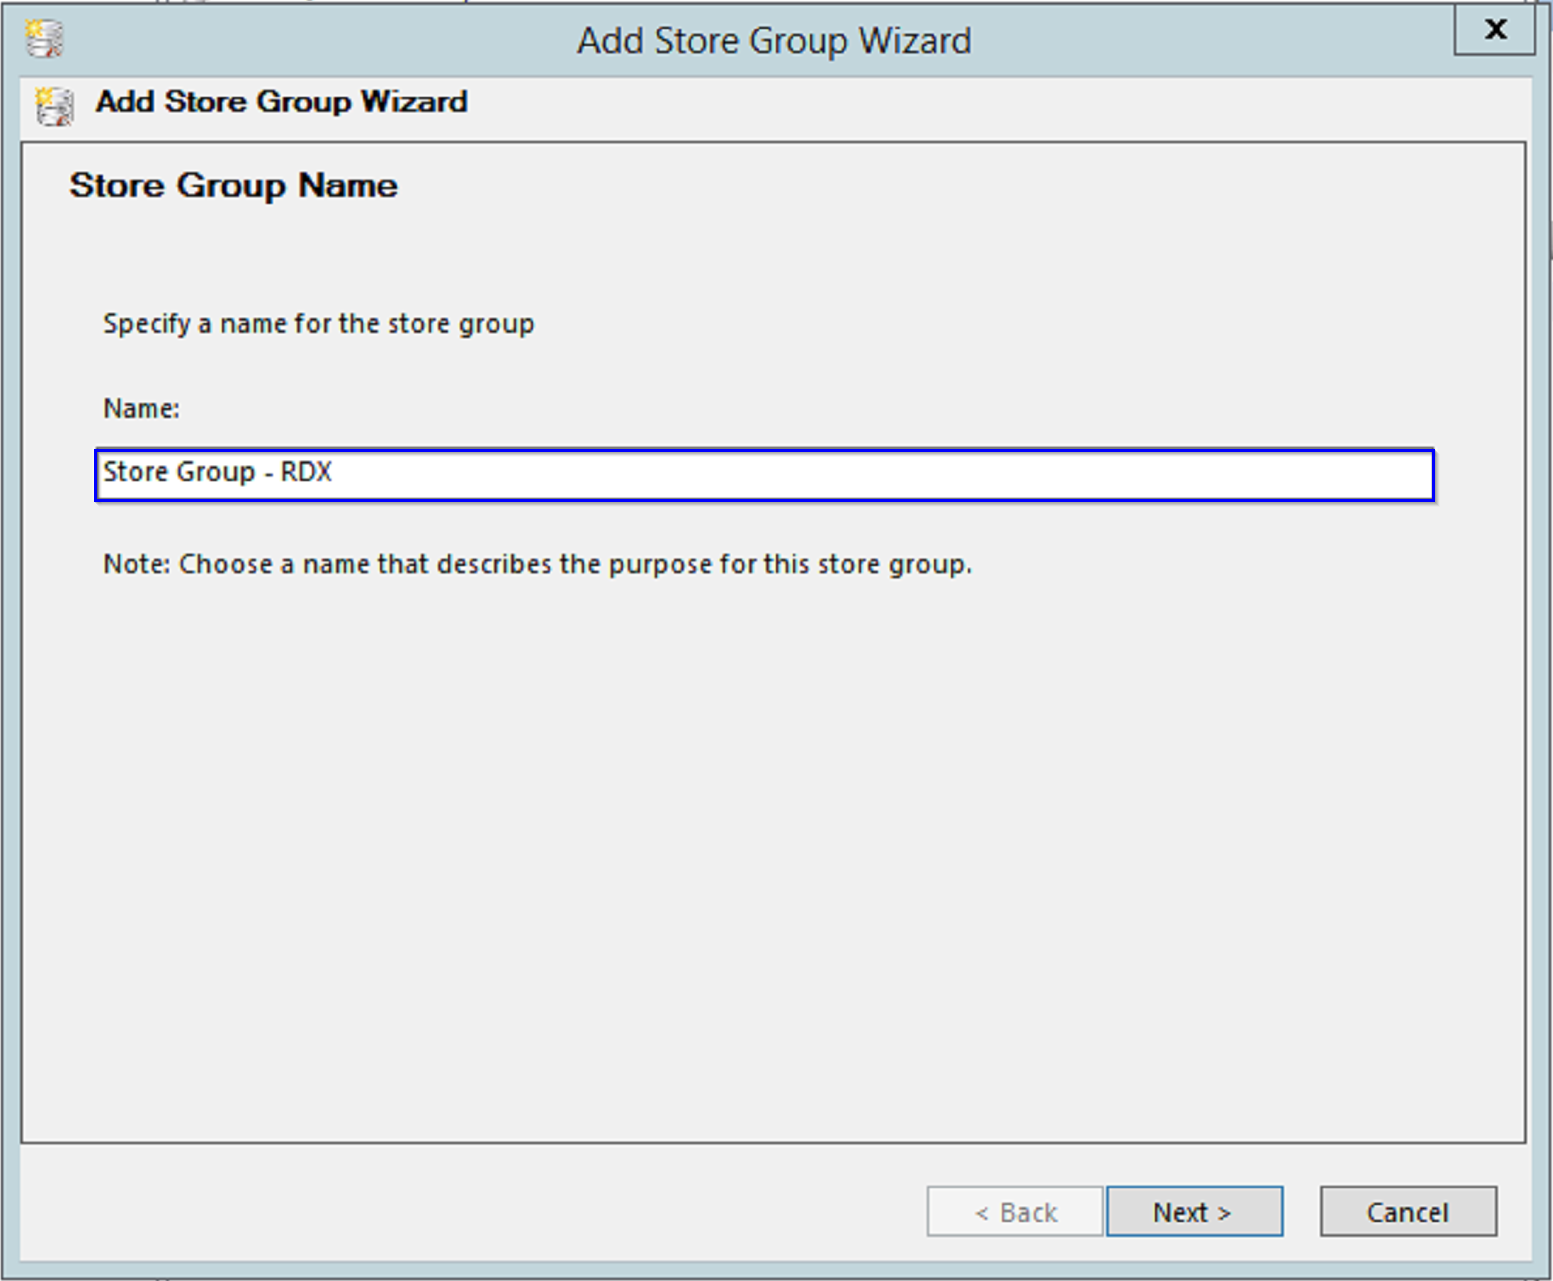
The Add Store Group Wizard starts. Enter the desired store group name in the Name: field.
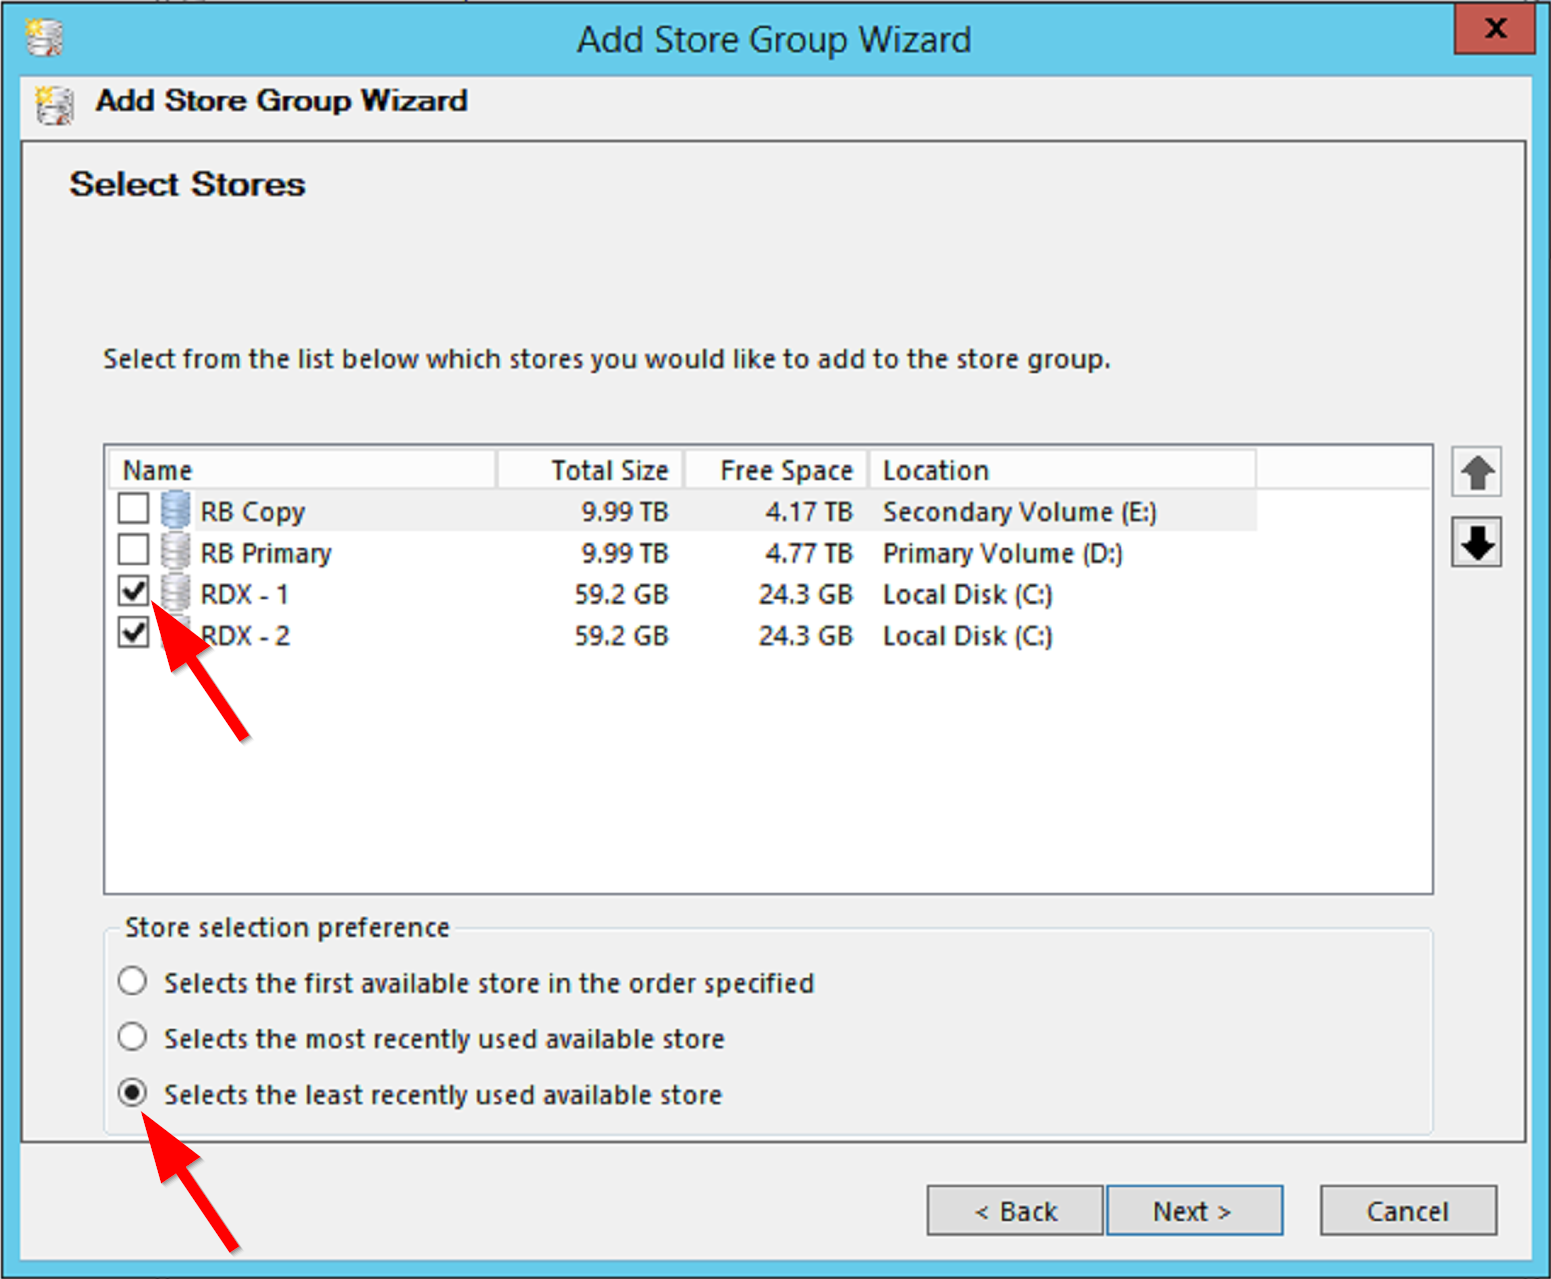
Click Next. On the Select Stores window, check the checkbox next to each store to add to the store group. Also, on the Store selection preference table, select the radio button next to the desired rule for store selection:
| First button | Selects the first available store in the order specified |
| Second button | Selects the most recently used available store |
| Third button | Selects the least recently used available store |
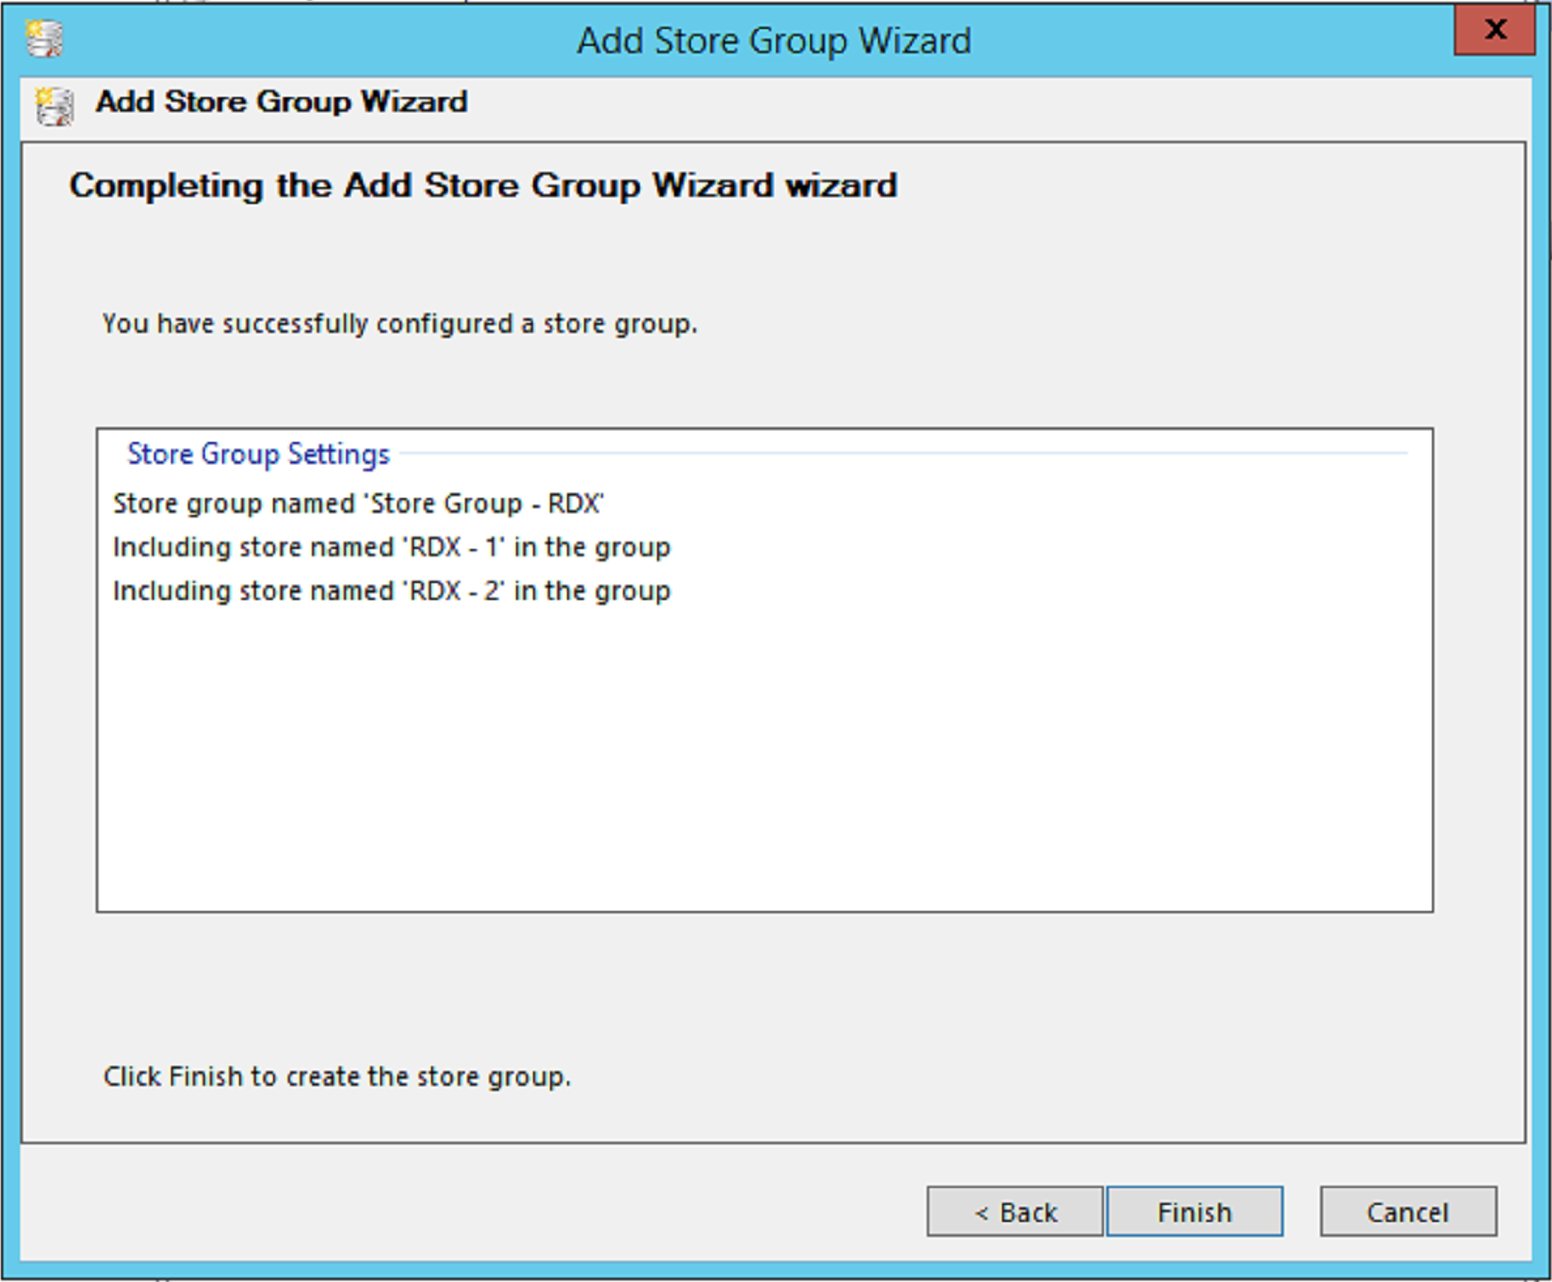
Click Next. On the Completing the Add Store Group Wizard wizard page, review the store group name and member stores. Click Finish to create the store group.
If you wish to edit the member stores of a store group, right click the store group listed under the All Store Groups folder and select Add to Group... from the contextual menu.
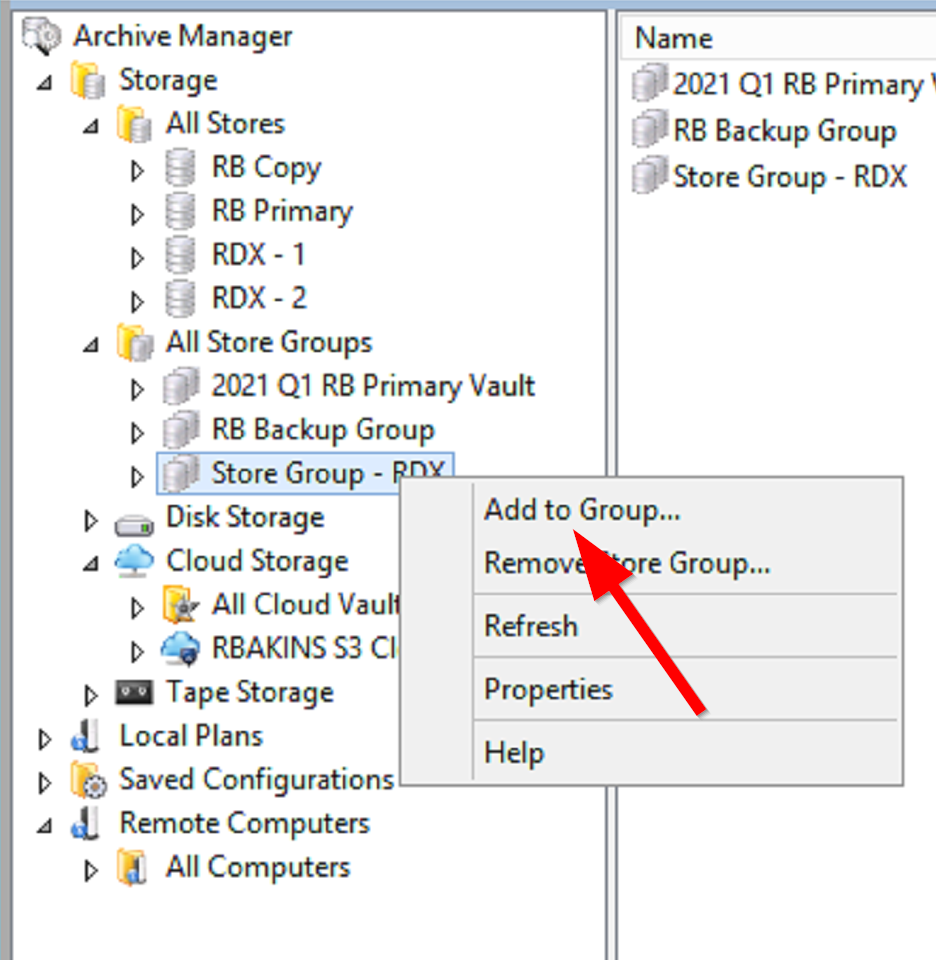
You can then add or remove member stores from a list of available stores listed in the All Stores folder, change the order of stores used to select the first available store, and change the store selection preference.
Set the plan to use the store group
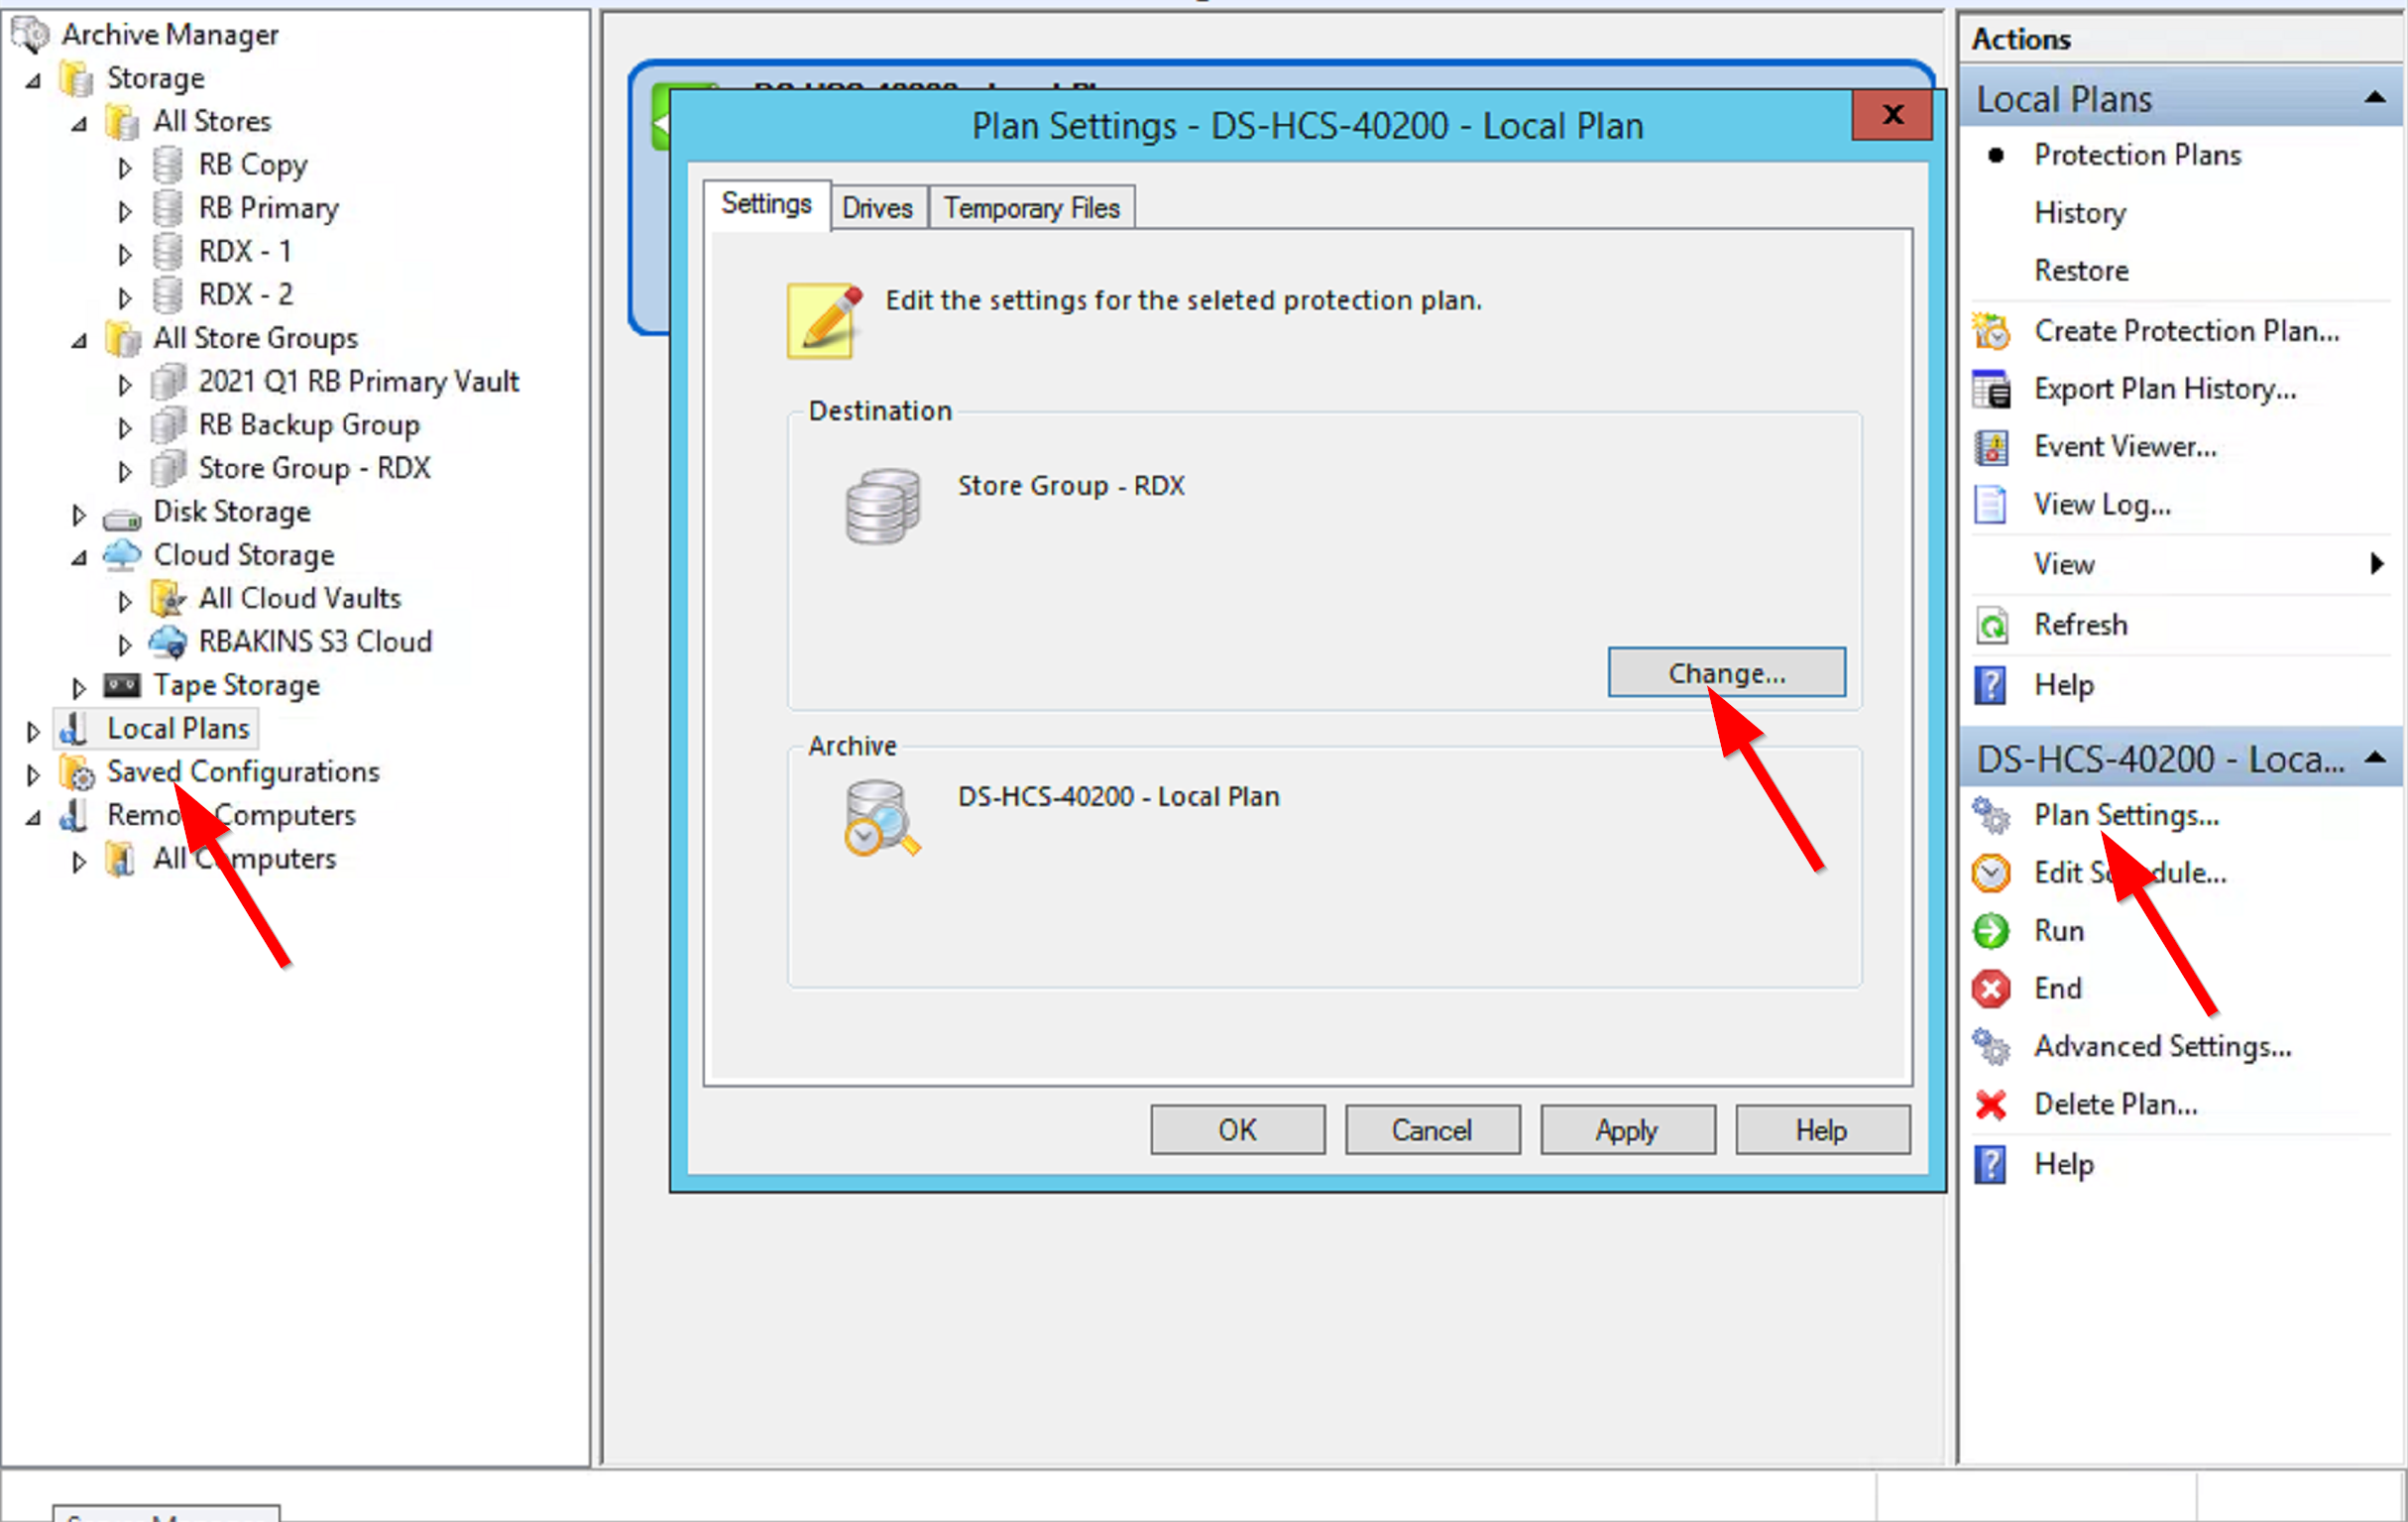
Go to Archive Manager Local Plans (for a local plan) or Remote Computers > All Computers > [the computer] (for a remote plan). Make sure Protection Plans is selected in the right pane. Highlight the protection plan in the center pane, then click Plan Settings... in the right pane. On the Settings tab, click the Change... button to change the destination store to use the store group. Click OK to save.