1) Enable SMTP Authentication in Microsoft 365
In order to send your Checkup Report via your Microsoft 365 email address, you first need to enable SMTP authentication for that email address in your Microsoft 365 admin center. Otherwise, Microsoft 365 will block requests to the SMTP server.
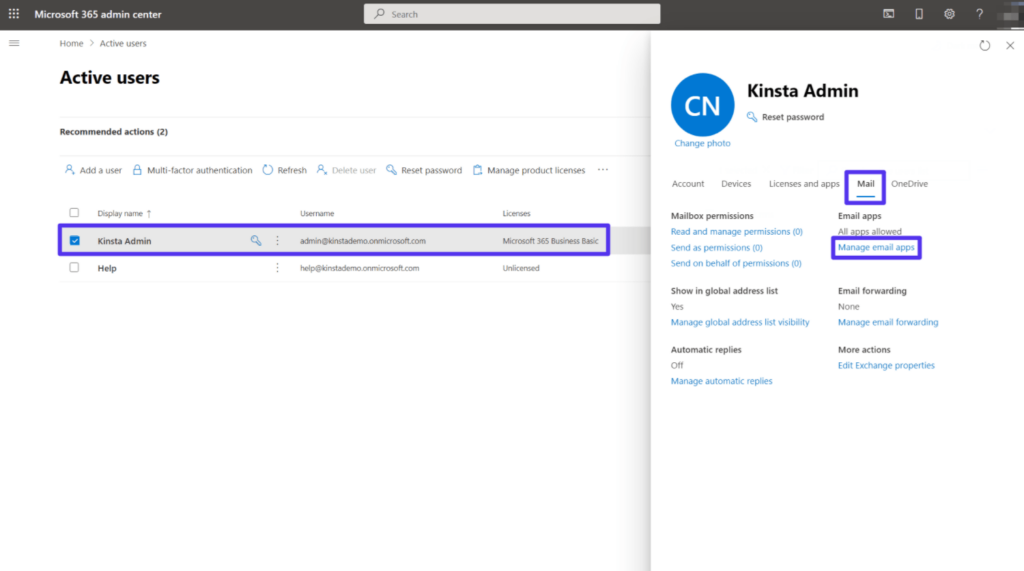
To get started, open the Active users tab in your Microsoft 365 admin center. You can click here to open the right page or expand the hamburger icon in the top-left corner of the admin center and go to Users > Active users.
Then, click on the email account that you want to use to send your Checkup Report. This expands a slide-out with more options.
In the slide-out, go to the Mail tab. Then, click the Manage email apps option.
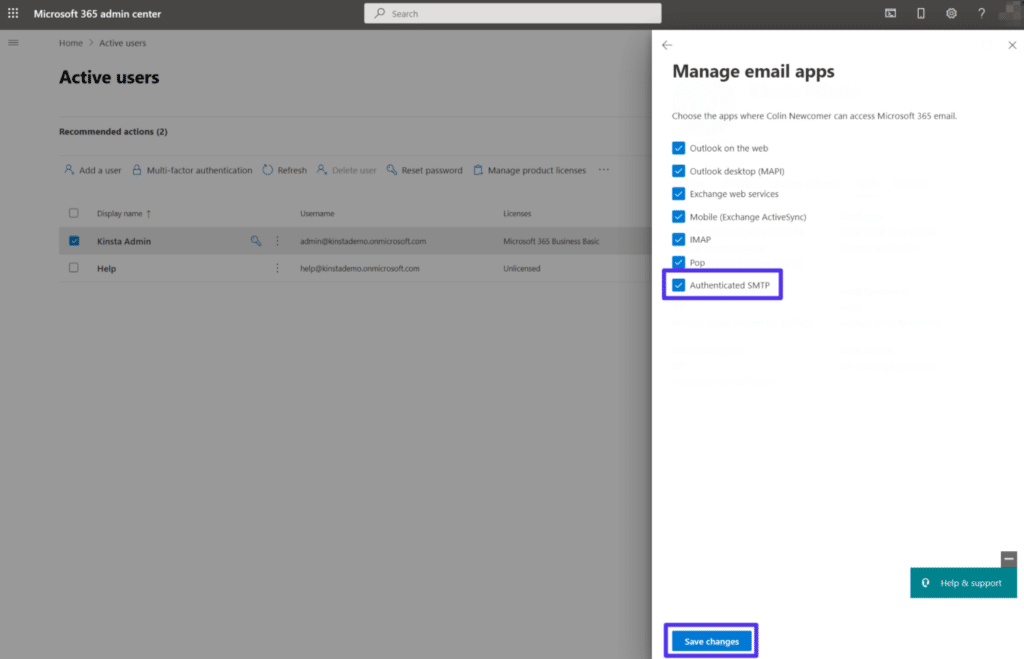
Check the box for Authenticated SMTP in the list of options. Then, click the Save changes button at the bottom.
And that’s it! You’re done working in the Microsoft 365 admin center.
2) Configure Checkup Report settings in Archive Manager Properties
In the Archive Manager console, open the Properties page for the Archive Manager node, and select the Checkup Report tab.
For the Microsoft Office 365 send use these settings:
- To: <[email protected]>
- Sender: <[email protected]>
- Host: <smtp.office365.com>
- Port: 587
- Use Secure Sockets Layer (SSL) Check this box.
- Sender password: <password for [email protected]>
In Archive Manager your settings will look similar to the following:
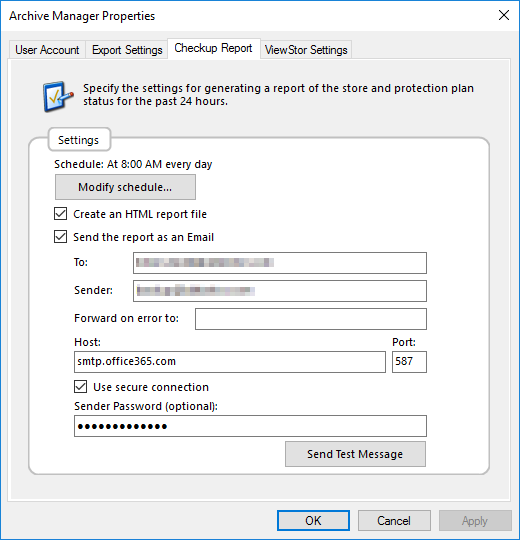
How to Configure Checkup Report settings.
20240612