DATASTOR provides support for full computer system recovery using a restore point generated with a Computer System type plan.
The target system must be booted into a pre-install environment using the DATASTOR-provided System Recovery Environment (SRE) in order to initiate the recovery. The SRE .iso image file can be downloaded from the software by clicking the link 'Save System Recovery Environment'. There are two .iso image files, one for BIOS based systems and one for UEFI based systems. (You do not need to burn a separate image file for each server you have protected.)
After the desired SRE .iso image file has been downloaded the software offers to burn the image to a cd, dvd, or USB thumb drive. While the burning process allows for CD and DVD media to be made bootable, the USB thumb drive must be marked with an active partition using the diskpart utility to make it bootable. Follow the steps below to prepare the USB thumb drive as a bootable device.
You will need to prepare the thumb drive prior to copying the image files to it, so you will be destroying the data on the USB thumb drive. Therefore, take care to have selected the the correct disk (step 5) prior to running the 'clean' command.The diskpart steps below were taken from technet article https://technet.microsoft.com/en-us/library/jj200124.aspx
Run diskpart and set thumb drive partition active and format.
The first step is to prepare the USB flash drive by using DiskPart, which is a command-line utility.
- Open a Command Prompt window as an administrator.
- In the new command line window that opens, type diskpart and hit enter.
- To determine the USB flash drive number or drive letter, at the command prompt, type list disk, and then hit enter. The 'list disk' command displays all the disks on the computer. Note the drive number or drive letter of the USB flash drive.
- At the command prompt, type select disk X, where X is the drive number or drive letter of the USB flash drive, and then click ENTER.
- Type clean, and then click ENTER. This command deletes all data from the USB flash drive (the disk selected in step 4).
- To create a new primary partition on the USB flash drive, type create part pri, and then click ENTER.
- To select the partition that you just created, type select part 1, and then click ENTER.
- To format the partition, type format fs=ntfs quick, and then click ENTER. Important: If your server platform supports Unified Extensible Firmware Interface (UEFI), you should format the USB flash drive as FAT32 rather than as NTFS. To format the partition as FAT32, type format fs=fat32 quick, and then click ENTER.
- Type active, and then click ENTER.
- Type exit, and then click ENTER.
Download and Copy the SRE image to the USB thumb drive.
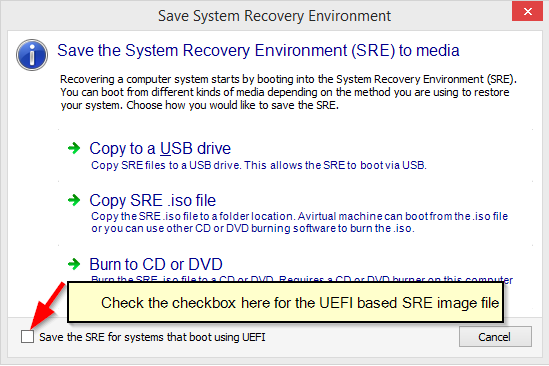
You can now download and copy the SRE image to the thumb drive from within the DATASTOR software. Click the link to Save System Recovery Environment, then check the box for the UEFI based SRE image file if desired, otherwise leave it unchecked for the BIOS based image. With the USB thumb drive inserted, click the option to Copy to a USB drive.
The Build system Recovery Environment Disk window opens with the iso file listed and the target drive listed with a USB drive. Adjust as appropriate, then click the Copy button to begin copying files.
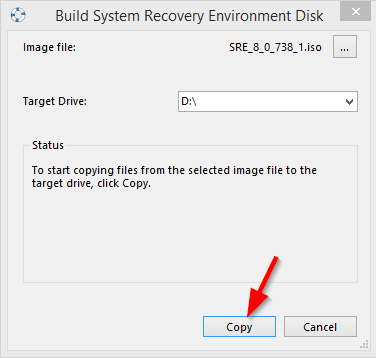
When the Status dialog box indicates the files were successfully copied, click the Cancel button to close the window. The thumb drive is now ready.