When the Professional RDX software is installed on Windows 10 build 14393, protections plans end with an error status that no usable cartridges were found, even though a cartridge with adequate free disk space was inserted in the dock.
The software creates scheduled tasks using the Windows scheduler 1.0 API. This build of the Windows 10 operating system may not support those type tasks anymore. Engineering is investigating. As a workaround, set the plan's scheduled task to run as a Windows 10 level task.
1. To check your build of Windows 10, type winver into the search bar and hit enter and check the About Windows dialog box for the OS build. If the build is 14393 or greater, follow the steps below.
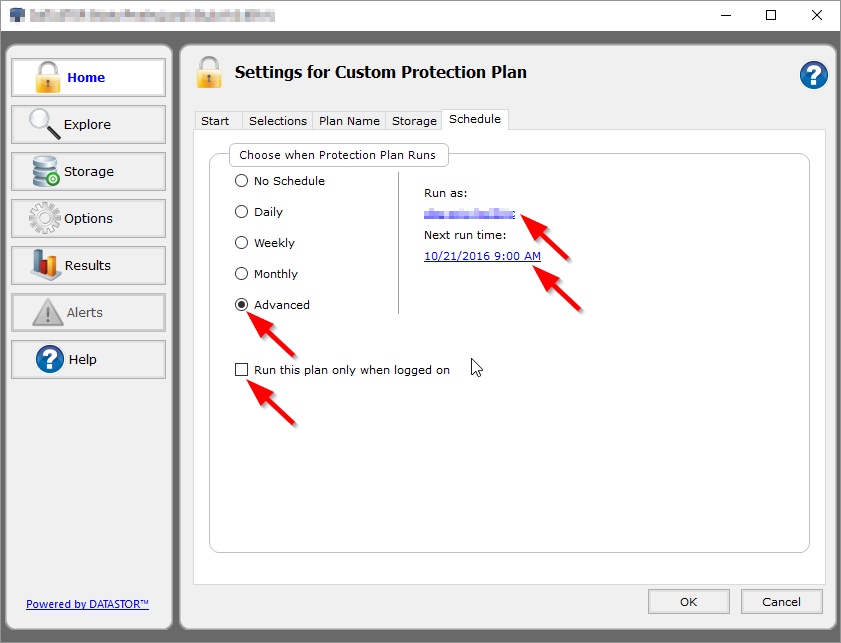
2. Edit the plan settings to set the Selections, Plan Name, and Storage as desired. To edit, click the Home button, then click the plan's 'edit settings' button. On the final tab of the protection plan settings, Schedule, define the schedule as an advanced schedule that runs whether logged on or not. Enter a schedule under the field 'Next run time:'. Enter an administrator account and password under the field 'Run as:'. Click OK to save the plan settings.
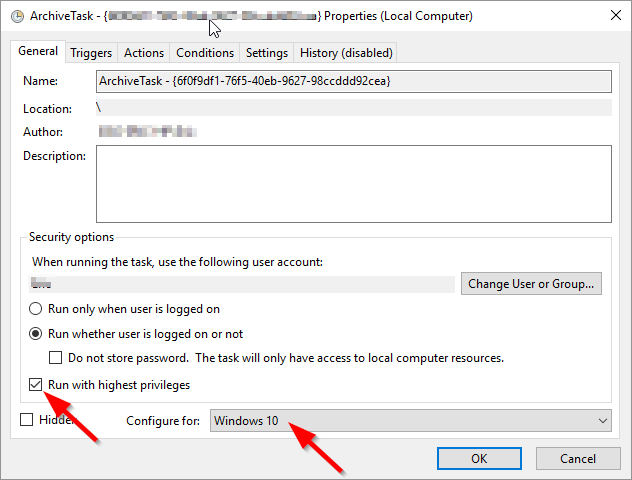
3. Then, open Task Scheduler to set the schedule to the Windows 10 level. To open, in the search bar, enter Task Scheduler and hit enter. In the left pane, click Task Scheduler Library and find the ArchiveTask in the center pane. Double click the ArchiveTask to open the task properties and on the general tab change the 'Configure for:' field from 2003/XP to Windows 10. Check the box to run with highest privileges. Click OK to save the change and enter the password when prompted.
The plan should now run on schedule. Once you put the workaround in place, if you later edit the plan settings through the software it will save the scheduled task as a 2003/XP task again so you will have to repeat the steps in Task Scheduler again. Have the plan settings the way you want them before using Task Scheduler and then refrain from editing the plan in the software to avoid having to use Task Scheduler again.