The cache drive used by tape vaulting may be moved to a different local disk volume, if desired.
The cache drive must be a local logical disk with an assigned drive letter. You may run the Configure Vaulting... wizard to change the cache drive without following the steps below if no vaulting task has been created on any store, yet, or if you first delete all vaulting tasks and all vaults beforehand. However, once a vaulting task has been created using the Create Store Task wizard, and is in use, you must follow the steps below to move the cache drive.
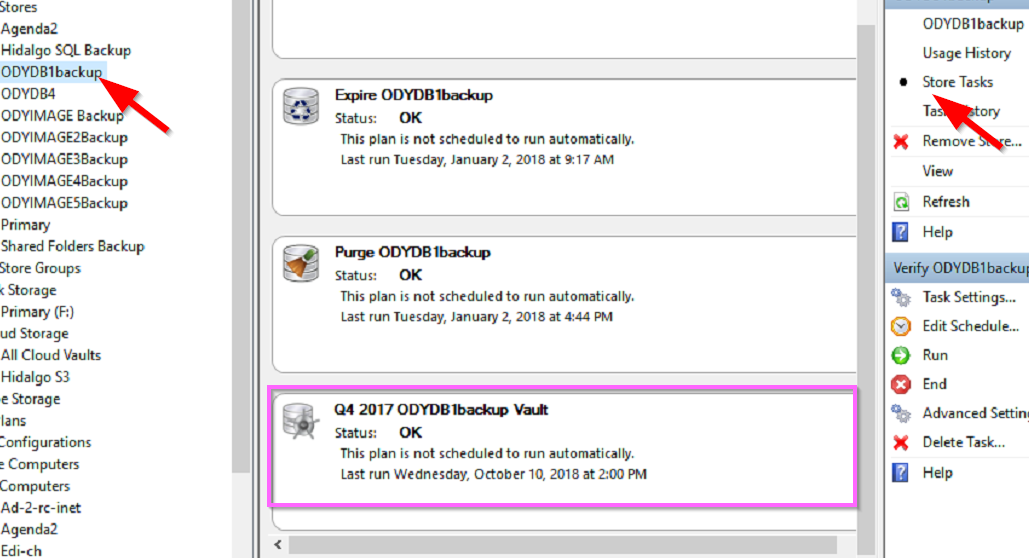
1. Confirm no vaulting task is running. Open Archive Manager > Storage > All Stores > [the store] > Store Tasks... and confirm the vaulting task is not running. See image.
Do not allow vaulting to run during the move of the cache drive.
2. Copy the tape cache drive folder or folders from the current cache drive to the new cache drive. The tape cache drive contains one hidden ObjectStore{[UID]} folder per vault, where [UID] is a unique ID. Do not copy any Objectstore folder associated with a store. To copy, follow the steps below.
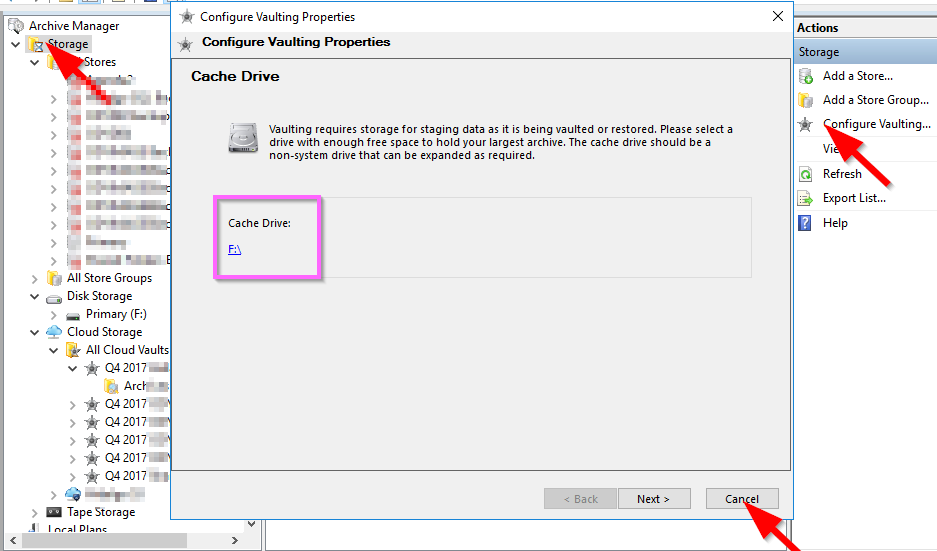
2a. Note the drive letter of the current cache drive and the new cache drive. To find the current cache drive location, open Archive Manager > Storage > Configure Vaulting... (right pane). On the first screen, note the drive letter of the current cache drive. Cancel the Configure Vaulting... wizard without making any changes.
2b. To find the new cache drive location, open Windows File Explorer and click on 'This Computer' and note the desired new cache drive letter.
2c. To copy the cache drive folders with robocopy, open a Command Prompt as an administrator. Refer to How to open a command prompt as administrator and change to the installation directory
At the command prompt, enter the robocopy command with the source and destination drive letters, excluding any Objectstore folder that correlates with a store listed under All Stores. See example below. Important: Any Objectstore folder associated with a store would contain a large amount of archive data and should not be copied to the new cache drive.
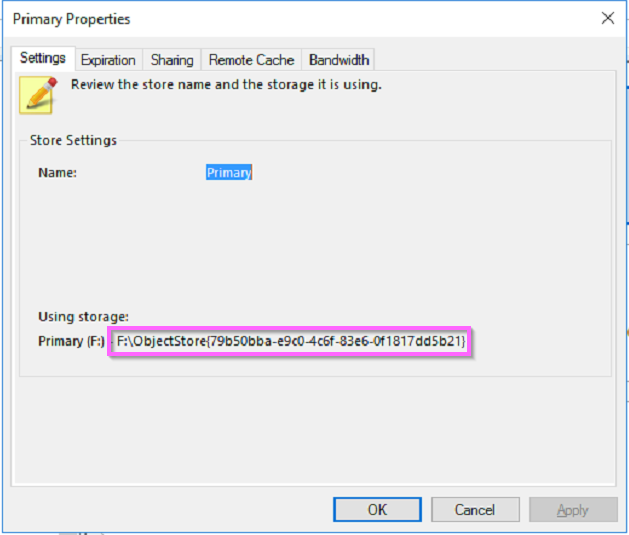
To check whether the store or stores listed under the All Stores node in Archive Manager share the same drive used by the cache drive, open Archive Manager > Storage > All Stores > [the store] > Properties (in the right pane). On the Settings tab, note the drive letter in the path to the store, as well as the Objectstore unique id. See image.
If the drive letter of the store is the same as the cache drive letter, note this folder to exclude it from the copy. Repeat this step for all stores listed under All Stores and exclude these paths from the robocopy command if they are located on the current cache drive.
An example robocopy command to copy cache folders from F: to G:, while excluding an Objectstore folder used by a store, and other hidden folders, would be:
robocopy f:\ g:\ /copyall /e /mt /log+:g:robocache.txt /xd F:\ObjectStore{79b50bba-e9c0-4c6f-83e6-0f1817dd5b21} "System Volume Information" "$RECYCLE.BIN"
This robocopy command contains switches to include subdirectories, to copy with multiple threads, to create a log file, and to exclude directories, that should also be used. Modify the command for your environment.
See image.

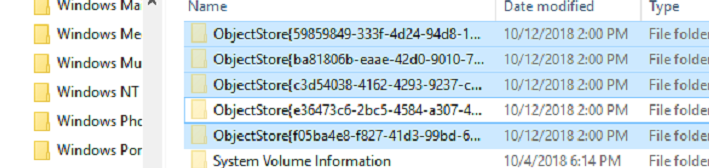
Alternately, you may use Windows File Explorer instead to copy all cache Objectstore folders to the new cache drive, while excluding any Objectstore folder belonging to a store. You must change folder options in Windows to display hidden files, and hidden operating system files. Refer to How to view the Objectstore folder on disk
To select multiple folders at once, hold down the Ctrl key while clicking the desired folders with the mouse pointer. Then, right click on a highlighted folder and select copy from the context menu. Then, right click and paste on the new drive letter. See image.
Once copied by robocopy or File Explorer, delete the original set of folders from the current cache drive. Important: take extreme care not to delete any ObjectStore folder associated with any store listed under the All Stores folder in Archive Manager.
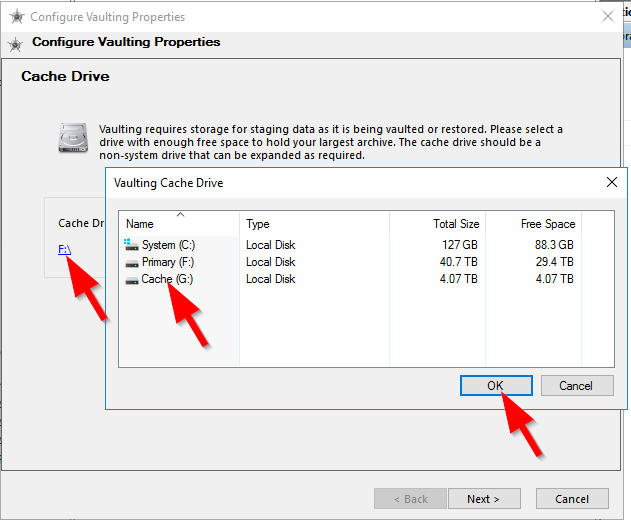
3. Run the Configure Vaulting... wizard again. On the Cache Drive page, click the blue link and select the new disk cache drive from the Vaulting Cache Drive list. For example, you may change the disk cache from F: to G:. See image.
Click Next, Next, and Finish, without changing any other setting on the other screens. Important: If you have encrypted your vault, and you change the encryption passphrase on the encryption screen, you will no longer be able to decrypt your data in the vault.
4. Open a command prompt as administrator and change to the installation folder. Refer to How to open a command prompt as administrator and change to the installation directory. At the command prompt, type: net stop aamsvc and hit enter. See image.

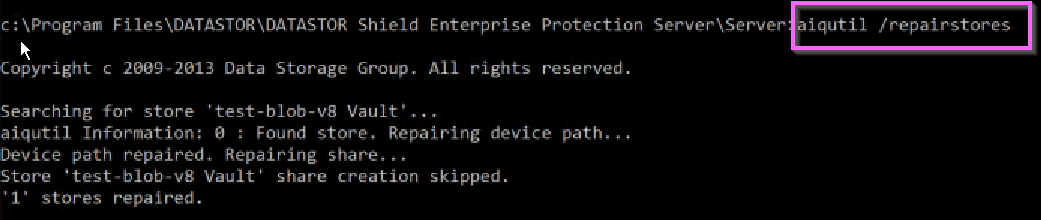
5. Repair each device path for each vault. At the command prompt, type: aiqutil.exe /repairstores and hit enter. See image.
6. Start the DATASTOR ArchiveIQ Manager service. This will update the StoreGroupInformation.xml file. At the command prompt, type: net start aamsvc and hit enter. See image.

7. Verify the DevicePath value in each vault's DeviceMap entry in StoreGroupInformation.xml references the new cache drive. At the command prompt, type: notepad Configurations\storegroupinformation.xml.
In the example below, the DevicePath values for the vaults reference the new cache drive, G:. (Not all DeviceMap entries refer to vaults, they may also refer to stores. These do not update.) See image.

If the DevicePath values for the vaults did not update to reflect the new cache drive letter, manually update them with the new drive letter, then click File > Save.